Showing posts with label beauty. Show all posts
Hello, everyone!

After a long, long phase in which I was absolutely fixated on lippies, it seems that I have returned to my first love: eyeliner. There was a time when I alternated using eyeliner in all forms: pencil, gel, liquid, etc. but ever since my Anna Sui Liquid eyeliner ran out, I've only been using my Bobbi Brown Long Wear gel liner. While it is my go-to liner for everyday use, it's not very travel-friendly. I debated buying either another Anna Sui one or the Etude House Play 101 Pencil for when I need to apply makeup on the go, but the former isn't exactly cheap, and the latter hardens way too quickly for my liking. 


Luckily, during an impromptu visit to Cosmed, I found this gem from 1028 Visual Therapy: Ultimate Superblack Eyeliner. Now, 1028 Visual Therapy is one of my favorite brands, but a disclaimer: I am in no way being paid or sponsored to write reviews. I'm not famous enough for that. (Yet. #char)

(L-R: 1028 Visual Therapy Ultimate Super Black Eyeliner, 1028 Visual Therapy Infinity Black Eyeliner, 1028 Visual Therapy Infinity Longwear)

When it comes to eyeliner, I usually consider three things: Pigmentation, Application, and Resilience.  For Pigmentation, this eyeliner really lives up to its name. When I swatched this eyeliner at the drugstore, I was surprised at how black it was compared to the other eyeliners from 1028 Visual Therapy. Almost like a Sharpie! Can you see how it stands out on my skin? AMAZEBALLS.

(L: Bobbi Brown Long Wear Gel Liner in Black Ink R: 1028 Visual Therapy Ultimate Super Black Eyeliner)

I also swatched it alongside the Bobbi Brown Long Wear Gel Liner in Black Ink. I really thought that the Bobbi Brown Gel liner was already pretty black, but beside the Ultimate Super Black Eyeliner, it doesn't even look black anymore! I feel betrayed by Bobbi Brown :<. The formula dries pretty quickly as well, so I don't have to worry about stray eyeliner getting onto my eyelids.


I've never used liquid liner with a felt tip before, and now all my regrets are crashing down on me. FELT. TIPS. ARE. THE. BOMB. The eyeliner comes with a really fine, felt tip which makes application really smooth and easy! The fine tip allows for more precision and for smooth, clean, and sharp lines. Perfect for a bold, winged eyeliner look! I don't usually wing my eyeliner, but I can already see myself donning winged eyeliner more often.


The Ultimate Super Black Eyeliner is waterproof, smudge-proof, and long-lasting even in the hot and humid summer days in Taipei. No amount of sweat, oily lids, or even furious rubbing can match up to the Ultimate Super Black and make it come off. In fact, I'd even go as far to say that the resilience is on par, if not better than the Bobbi Brown Long Wear Gel liner.


I'm really happy with this product. With it's intense pigmentation and amazing resilience, I think it might just become my new favorite eyeliner. At 360NTD, it's worth every penny. A repurchase wouldn't hurt either. I'm already planning on using this the next time I watch a concert! I'm confident that it would be able to handle all the blood, sweat and tears that would inevitably come out when I see 오빠.


Wow that name is a mouthful.

Hello everyone! It's been a while, but here's a mini-review. I picked up this product during my last visit to Taipei. It's the TTMax 16 Hours Color Stay 2-Step Liquid Lipstick. I randomly came across it in 86Shop and well, the "16-hours" spoke to me. And the rather loud sign that said "99NTD."


I've been on the prowl for long-lasting lippies that don't transfer much, and to be quite honest, I thought I hit the jackpot with the Rire Lipmanicure (You can read my review here.). However, it dried my lips up so much after every use that I only use it occasionally now. I've had much better luck with the TTMax so far, and I have very few complaints about it.


For the 2-step liquid lipstick, each tube comes with lip color, and lip gloss. The instructions on the tube say to apply the color first, then leave it to dry for two minutes. Afterwhich, you're free to apply the clear, shining gloss. The lip color comes with a doe-foot applicator, which makes it really easy to apply the product. The color is pretty opaque for this particular shade and from my experience, one dip in the tube is enough for a solid coverage on my lips. As it dries, it starts feeling a bit sticky. That's easily fixed by applying the shining gloss.


The gloss comes with an applicator that resembles a white calligraphy brush, not unlike the brushes one would usually see on a liquid brush eyeliner. This makes it a bit difficult to apply it on evenly, as the brush does not spread. I would have preferred another doe-foot applicator instead. To be fair, it's amazing how none of the lip color transfers onto the white brush when I'm applying the gloss. I'm not really a fan of lipgloss as I prefer matte finishes when it comes to lipstick but gloss does somewhat dry up after awhile, leaving a semi-matte finish instead of a glossy one.

Look, guys. It's a GIF of my face!


In terms of resilience, this lippie is pretty amazing. It doesn't transfer at all, no matter how much water I drink or how much I try to rub it off. Eating will make it come off though, especially if you're eating something oily. However, for things like cakes or bread, it stays pretty much the same.  I never had it on for a full 16 hours, but I did wear it for 11 hours once. It faded a bit, but I did have two meals in that 11-hour period. When it fades, it doesn't leave much of a stain, which I feel is kind of a bummer because that means I have to touch up if I don't want it to end up looking like a badly done reverse-gradient lip. Leaving it on for 11 hours did dry out my lips a little bit though, but it's nothing in comparison to the Rire Lipmanicure.

All in all, I really do like this product well enough to repurchase it when the time comes.


Hello everyone! This time, I'm doing a favorites post! I've been meaning to do one, but for a long, long time, my favorites didn't really change much from the contents of my make-up bag. But a over a year has passed, and I've acquired quite a number of new things in my make-up collection that I really, really love.


Smashbox On The Rocks Photo Op Eyeshadow Palette

Eye makeup is my favorite, so of course, topping the list is the On The Rocks Photo Op Eyeshadow Palette from Smashbox. I've been eyeing this particular palette for months before I finally decided to buy it. I was apprehensive about it at first, because what the hell was I going to do with 28 new shades? Shades that I really, really liked? But it was the same price as the Full Exposure Palette from Smashbox and twice the amount of shades how could I resist? Drama aside, the palette comes with 28 shades, a mix of matte, satin, and glitter finishes. I really love how smooth, buttery, and not to mention blendable these shadows are. The shadows are all very pigmented, and don't let the bright colors fool you- they're all very wearable. I've worn all these colors at least twice, and that's saying something considering how many eyeshadow colors I own. For my last trip to Taipei, I brought this with me because it has a wide spectrum of colors and finishes, so it's easy to use for whatever look you're going for. 


 Double Wear Hydrating CC-dation in Nude Beige from 1028 Visual Therapy

Next on my list is the Double Wear Hydrating CC-dation from 1028 Visual Therapy. For a drugstore brand, 1028 Visual Therapy really is something! I have yet to try something from 1028 Visual Therapy that disappointed me.  Prior to this, I used 1028 UV White CC Essence, but it ran out because I would lend it to my younger brother whenever he needed stage makeup. Upon hearing that I was out of CC Cream, my aunt gave me her Hydrating CCdation in Light Beige, and from them on, it was love. The CCdation is a combination of CC Cream and foundation. The coverage ranges from light to medium, but what I love most about it is that it doesn't dry my skin out. In fact, I feel like my skin is even moisturized after using it. The "hydrating"part of this CCdation is extremely helpful, and I have taken to alternating this with my bareMinerals Foundation as the powder tends to dry my skin out. Much like a regular CC Cream, it does even out my skin tone very well, and covers up the redness around my nose. And though the consistency of the CCdation is a bit watery, it does last for over eight hours, even when I think that I have sweated it off. This is a blessing considering I live in the Philippines. (SPF25, too. Orayt. Rock and roll to the world.)


bareMinerals Blush in Beauty

I got this blush as a free sample along with the bareMinerals Foundation set from our family trip to Osaka last March, and it's the only blush I've used since then. It's a teeny-tiny container, but it's still pretty full even with my mom and I sharing it. I love how pigmented it is, and a little goes a long way. It's really lightweight and easy to apply. At first. I thought it would be difficult to not overdo blush with this, but I've found that it was pretty easy to control how pink I wanted my cheeks to end up.


bareMinerals Warmth All Over Face Color

The first time I got my hands on this was when my aunt gave my mom a bareMinerals Foundation set, and I ignored it because (1) I had no idea what to do with it and (2) I thought the shade was too dark for me. Now, I've taken to using it as a bronzer, blush, contouring, or just lightly dusting it over my face whenever my foundation leaves me looking too pale. It's so versatile. A little also goes a long way, and I do have to be careful not to overdo things with this powder.   


Ultimate Oil Control Powder from 1028 Visual Therapy

I know I've written about this before, as it's always been in my makeup bag, but I just have to rave about this. This is my HG pressed powder. It's light on the skin, absorbs oil really well, and leaves my face feeling softer after use. That's what I love about 1028, to be honest. It's beauty and skincare rolled into one affordable package. In the picture is actually my third purchase of this powder- it's just that good. It also works pretty well at setting my makeup, almost on par with my Guerlain Meteorites Finishing Powder.


Nyx Extra Creamy Round Lipstick in Pandora

Now, I'm not much of a lipstick person, as I find it a bit of a nuisance when I'm eating or taking a drink, but this frosty, purple color just caught my eye. This was originally a gift to my mom, and I asked if I could try it. Once I did, I knew I wasn't going to give it back. (Thank you, Mama.)  It applies really smoothly, and the touch of shimmer is just  right. It's a bit sheer, but buildable if I want a more intense color. I was also surprised at how resilient it was! Really, minimal touch ups needed through out the day. It's moisturizing. too. Yes, I know it's purple. A really pretty, purple. Yes, I know it makes me look like a Disney Villain. And yes, I do want to look like a Disney Villain.


Last on my list is this unnamed/no-brand puff which I bought from Sasa at Taipei. I first bought this on a whim, because I was looking for an alternative to the Too Cool For School Marshmallow Puff I once owned. My experience with the Marshmallow Puff did not end well, and I'm not exactly willing to shell out big bucks for a Beauty Blender. I'm not a fan of using brushes with liquid foundation as the results usually ends up looking streaky, so I gambled on this puff I randomly saw at Sasa. And I hit the jackpot. It wasn't really much of a gamble, as it only cost around 150Php and works just as well, if not even better, than the Marshmallow Puff. It's much softer too, so it's easier to bounce the round end on my face for a natural, even coverage. The tip also makes it easier to get foundation under the eyes and around the nose.When I use it with lighter shades of foundation, like the CCdation in Light Beige, it blends the foundation so well on my skin that it's as if I didn't put on foundation.

That's it for my favorites (for now). Hopefully, the Christmas Season will bring me more favorites to come. Teehee. <3


There are just some things that one can't outgrow, and for me, Prince of Tennis (TeniPuri) is one of them. I first got into TeniPuri back in 2007,  when I was still in highschool and eight years later I'm, once again, hooked on the series and its franchise (anime, manga, character songs, stage musicals– you name it). It's ridiculous, really, how much I love this series with all the outlandish tennis moves with just as outlandish names. Would you believe they made a stage musical out of it? A hugely successful one at that? I've been practically drowning in TeniPuri for the past month and it was only a matter of time before I did something TeniPuri-related.

So here it is: TeniPuri-inspired nails. To be more specific, Hyotei Gakuen-inspired nails. Prince of Tennis tells of Seigaku's, a middle-school tennis team, bid to win the National Tournament and Hyotei Gakuen is one of the many rival schools they face.


Image from Zero-chan.net

Like many of the other rival schools in the series, Hyotei is full of eccentric characters that are all strangely endearing that it's difficult not to root for them. Eventually, they ended up as my second favorite rival school in the series, the first one being Rikkai Daigaku Fuzoku.

Hyotei's color motif leans more towards  light blues and gray it was easy for me to find lacquers from my collection that would suit their image. 

(L-R) Seche Vite Dry Fast Top Coat, OPI Teal the Cows Come Home, Clinique Made of Steel

In Japanese, Hyotei (氷帝) can be roughly translated into "ruler of ice." (If I'm not mistaken.) Due to this, Hyotei is associated with ice.  This association is most notable when it comes to the captain and one of my favorite characters, Atobe Keigo. This is largely due to one of his techniques in the series called "World of Ice", where he can see an opponent's weak spots which are represented by shards of ice. (Sshhh. This is anime/manga. It's allowed to be outrageous.) In the musicals, Hyotei even has their own version of what I call the "douchebag rival song" aptly entitled "Ice Emperor" in which they pretty much tell the protagonist team, and everyone else to "Kneel down, worship, and honor us." This is why I opted for an icy blue and I thought Teal The Cows Come Home was perfect. I added Made of Steel as an accent nail to nail (pun intended) that Hyotei Gakuen color motif. 


Anyone who knows me knows that I am weak against sparkly things, so instead of just going with the icy blue and dark grey I added on rhinestones and glitter. It may seem a bit over the top, but I was going for Atobe Keigo, arguably the center of Hyotei and known for being over the top. Self-styled and widely recognized as "King," Atobe's flamboyant tendencies have been somewhat of a running joke within the franchise and the fandom, so the rhinestones play into the theme well. Maybe I should change the title of this post to "Shousha wa Atobe!" instead. 


I had a lot of fun with this nail art. Granted, it was a bit difficult getting the rhinestones on my nails, but seeing the end-result is satisfying. Isn't it pretty? Not only is it a combination of two of my interests (anime/manga and cosmetics holla), but it suits the Christmas Season as well! December is drawing near and nothing says Christmas festivities quite like a little sparkle sparkle.

I'm hoping I could do more of these cross-overs in the future. Rikkai nail art would be nice, if only I could pull off yellow nails.

Until next time!

Guess who just stepped into the world of lippies? I used to be not too keen on lip products aside from lip balm or lip tints, but I am a changed woman now. I do use lipstick occasionally, when I know that I won't be eating or drinking any time soon, but it's still one of those things I usually forgo when I put on makeup.

My biggest problem with lipstick is that it tends to transfer and fade easily, even when I'm just taking a drink. It might be just me over-reacting, but whenever I see lipstick left on that straw I just used, or the glass I took a sip from, all I could see was the money that went into that lipstick. Still, I did like lipstick well enough, so I began my search for resilient lip colors. During my last visit to Taipei, I found out about Clio's Lipnicure, which had a lot of raving reviews. Sadly though, the original matte Lipnicure was no longer on sale, and I wasn't too keen on the new Lipnicure Glass and its shades. However, I did find the Lipmanicure by RiRe, an obscure Korean cosmetics brand. It was obviously a dupe of the Lipnicure, but since I fell in love with the Wine Burgundy color, I went for it.

Rire's Lipmanicure in Wine Burgundy and Muse Red

Rire's Lipmanicure comes in 11 shades, but they're not easy to find. In Taipei, they're not available in most drugstores or beauty stores. I was lucky enough to find these two colors at Strawberry Paradise Beauty House in one of the alleys in Ximending. In most other places, like 86shop, the shades available were either too pink, or too orange. These were on sale when I bought them, so I bought two colors: Wine Burgundy and Muse Red. At first glance, they look like cute little bottles of nail polish and come with a short applicator. Upon opening the bottles, you get hit by this artificial-smelling fragrance of sort, but it disappears after a while, so I didn't get too concerned about it.


Personally, the applicator was too short and wide cap made it really difficult to apply the lipmanicure. Especially for someone like me who prefers clean lines when it comes to my lips, the applicator was a nightmare. Midway into applying this for the first time, I gave up and switched to a lip brush.

Muse Red (L) and Wine Burgundy (R) applied with the built-in applicator.

Muse Red is a warm, matte, bright red shade, while Wine Burgundy is a rather cool, matte, dark red. All of the Lipmanicure colors come in matte, but you can also opt to purchase the top coat if you want a glossy finish. (Just like a real manicure!)

When it comes to application, awkward applicator aside, the product applies smoothly. However, it is important to note that the product dries quickly. This is because once the lip manicure dries, it will not budge. If you try to even out layers by building it up, you're going to end up with patchy looking lips. What I do is, working one lip at a time, I outline my lips with it, then fill it into get a nice, even layer. The great thing about these shades though, is that one layer is enough for a solid finish. Honestly, two layers might be a bit too much.

Aside from Wine Burgundy and Muse Red being just the colors I wanted for my lips, I loved how resilient it is.This is what the Lipmanicure looked like after I put it under running water and tried to smudge it with a finger.


It smears a bit, but otherwise, it looks untouched. If I hadn't touched it right after wetting it, I doubt it would have smeared. I've worn Wine Burgundy a couple of times, and it really doesn't transfer onto anything. Not on my glass, not on a straw, not on a bottle of water...that's how resilient it is! Though wiping my mouth with a tissue did cause some of it to come off, it was barely noticeable. It did start fading and smudging when I had oily food, but that's understandable. 

Removing it is a bit of a challenge. Although my Shu Uemura Cleaning Oil had very little problems getting it off my lips, it did require a bit of elbow grease to get the stains off the area around my lips where it had smeared while I was trying to remove it. 

The RiRe Lipmanicure dried my lips out so much, that it cancels out its other positive qualities. It's such a shame because I really love the Wine Burgundy shade and it's staying power. If anything, I'll just end up putting this on whenever I feel like taking a nice selfie and then removing it immediately after.

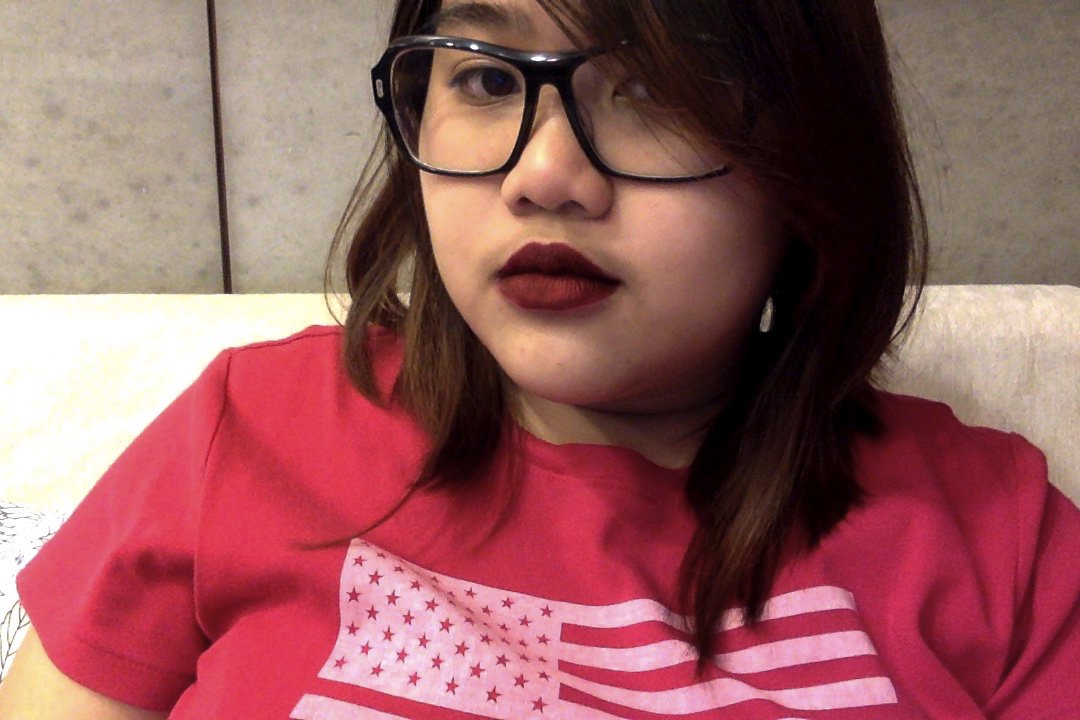
Here is a little selca of me when I first tried out the Wine Burgundy color:
Isn't the color so lovely? I feel like an evil queen. Or a teleserye contrabida mom.


Hello everyone! It's been a while (a really long while) since my last post, but I'm back with a short nail art set review!

Aside from it being a long time since I last did a review, it has also been ages since I last put on nail polish, let alone nail art. So when my older brother brought me this as pasalubong  from his trip to Malaysia, I got really excited and couldn't wait to try it out.


This is the Bling It On Neon Set from Nails Inc. London. I have honestly never heard of this brand before, so I have no expectations for it other than yes, sparkly. I like. 


The set comes with two bottles of glitter, a small bottle of base lacquer, a small bottle of top coat, a tray to catch glitter with, and a brush to sweep away excess glitter. I first attempted following the instructions on the back of the box, but it didn't really work out for me. The instructions said to pour an amount of glitter onto the tray, and then to press a nail with wet lacquer on it so that the glitter will adhere to the nail. I tried this method but I've found that the angle was simply too awkward and the method too tedious. The base lacquer was also disappointing. Application was terrible and streaky at best, and the glitter did not adhere to it at all! However, I was determined to use the glitters so I ended up using a different base and a different topcoat altogether.

Seche Vite Top Coat, OPI Teal the Cows Come Home, Nails Inc. Bling It On

For the base lacquer, I used Teal the Cows Come Home from OPI. The color is really close to the color of the glitter so it provides a more solid appearance to the glitter as compared to using a white base. I also chose to pour the glitter over the wet base and let the tray catch the excess– much more efficient. The tiny tray that came with the set was really useful though! It has a tiny notch on the side that made it easy to pour back the excess glitter into the bottle. The brush was also really handy for sweeping away excess glitter so that the nail art won't look too chunky.


No topcoat.

With a proper base coat, the glitter looks FANTASTIC. It really does live up to it's name as "bling"! It's bright, it's vibrant, and it's eye-catching. Without topcoat, it's already really sparkly and has a sandy texture to it, which I personally love. I had to sacrifice the texture though, and added two layers of top coat to make the nail art last longer. Without top coat, I doubt this nail art would last more than a day. 

With Seche Vite Top Coat


I've mentioned before that I really love sparkly, and brightly colored things, but I've usually opted out of using glitter lacquer as it takes forever to wait for each individual layer to dry properly. (I may or may not have patience issues.) However, with this nail set, it's just a matter of applying glitter on top of a wet base, and then pouring glitter on it separately. It may seem like it's more work, but it has a more solid finish from the get-go compared to glitter lacquer, which needs some building up before you get a solid, glitter, finish. 

Aside from the base lacquer (and the top coat that I didn't even bother opening), this is a pretty good nail art set. Simple, straight-forward, yet still so, so pretty! I'm looking forward to try the Bling It On Feathers I also got from my kuya!


Until next time!

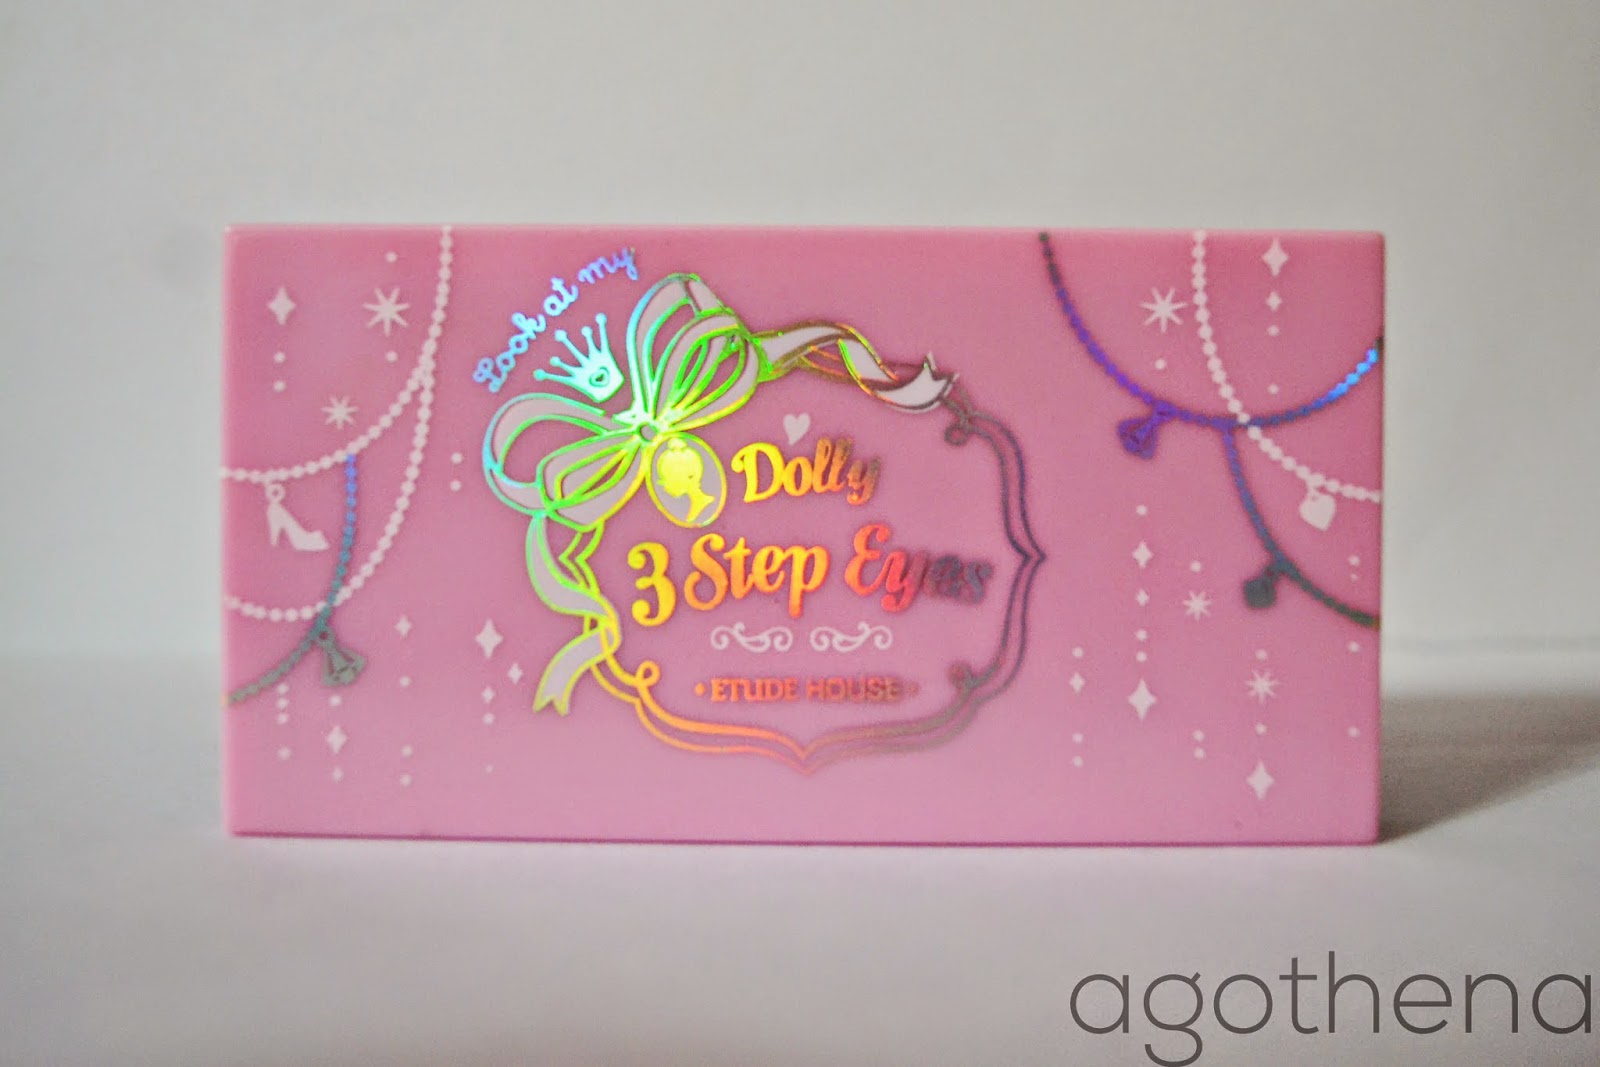
Here is another review for another one of the items I picked up in my Taipei haul: Dolly 3-Step Eyes by Etude House. I walked into Etude House that day planning to buy eyeliner and lip tint, but when I saw this palette, I knew I wouldn't be able to leave the store without it.


Most of my eyeshadows are of nude shades, and I've been wanting to bring more variety into my collection. When I saw this palette, I knew it would be perfect. I personally love bright and bold colors, so it's no wonder that this managed to catch my eye! From L-R: a subtle peach shadow with a satin finish, a shimmery hot pink, and a deep burgundy with a matte finish.


The color-payout is amazing! How you see it in the palette is how it shows up on your skin! I've had my fair share of eyeshadows that look pretty in the palette but does not look good when applied. I was pretty skeptic about the pink shade, at first. I honestly didn't think it would even show properly once applied but whoa. Was I proven wrong. Even without a base shadow or primer, the pigmentation is still solid. Unlike with most other coloured eyeshadows I've tried, there wasn't much need to build it up.

 That being said, the fallout is pretty bad, especially from the middle shadow. I've taken to applying eyeshadow before I apply my base whenever I use this particular palette. Still, the shadow is pretty resilient and when paired with primer, lasts through the day with minimal fading! 

I am very happy with this palette and I'd recommend it to anyone who wants to try something bright and bold for a change!


Hello everyone! I'm back with another make-up post! My Clinique Moisture Surge CC Cream was running out, so I bought the UV White CC Essence by 1028 Visual therapy during my stay in Taipei. The Moisture Surge CC Cream was really pricey, so I thought to buy a cheaper alternative.


I ended up choosing the UV White CC Essence from 1028 Visual Therapy. Not only is it reasonably priced (usually at 420NTD), but it was on sale, too! Also, I own two other 1028 products: the Macaron Eyes Palette  and the Ultimate Oil Control Powder and neither have disappointed me so far. 


The CC Cream comes in only two shades: Light Beige and Natural Beige. I bought the Natural Beige one, though the difference in the shades aren't much. The Light Beige shade still matches my skin tone pretty well.


For a CC Cream, it certainly does its job. I've only used it twice so far, and though the coverage is light, it does well at concealing redness on the face– almost as good as my Clinique one. The consistency of the cream is pretty light, a tad bit more runny and smoother than my Clinique one. Which is probably the secret to my favorite thing about this CC Cream: I can't feel it. I usually opt out of using a base because I can literally feel it sitting on my face, no matter how light I apply it. However, after applying this CC Cream, it doesn't feel like anything at all. Even when I touch my face, I can only feel my skin getting a bit more smoother. Just like how it feels when its freshly washed. The only downside to this is that because I feel like I've applied nothing to my face, I end up using more of the CC cream because I feel like I haven't put on enough. 

It is also important to say that though I am used to applying my base with a sponge or a brush for an even finish, I found that the 1028 Visual Therapy UV CC Essence applies flawlessly even with just my fingers! 

All in all, I am looking forward to incorporating this into my usual make-up routine. :)

Until next time! 


It was sale season while I was in Taipei and being the weak, weak person that I am, I couldn't resist. So here is my lovely assistant, Onew, to show you my Taipei Make-Up Haul!


1. Rosy Tint Lips #4

I've also had my eye on this for quite some time, because the color was exactly the shade I wanted for my lips, and it's easy to manipulate and use for gradient lips! 

2. Play 101 Pencil #1

This eyeliner has long been in my wishlist, but I've only decided to get it now! This was recommended to me by my Jagiya, Alex. According to her it was very resilient. After swatching it for a couple of times and trying rub it off and failing, I was sold. It applies really smoothly too! 

3. Dolly 3-Step Eyes #3

Okay, I didn't really plan on buying this, but when I saw the color and tried it out on my skin, I knew I couldn't just not get it! (And it was on sale too!) All you have to know for now is that the shades are to die for because I'm going to do a review on this real soon! 


1. Anna Sui Liquid Eyeliner Pen in Black

This was the first ever liquid liner pen I had, and I've yet to try another one that works for me as well as this one did. It's easy to apply and really gives clean, bold lines. I've never experienced any smudging and smearing with it, even during that one time I was caught in the rain while wearing it!

2. Anna Sui Eyelash Curler

Of all the eyelash curlers I've tried (Shu Uemura, Koji, ELF, Fanny Serrano), the Anna Sui one has been the only eyelash curler to really curl my lashes and not leave my eyelids in pain. It also has a really sturdy feel to it, and the pad is more gentle than even my Shu Uemura curler.

3.  1028 Visual Therapy UV White CC Cream in Natural Beige

My Clinique CC Cream is nearly running out, and I wanted to try a cheaper alternative. My skin is crazy sensitive and I swatched this sample on my neck or jaw a couple of times before deciding to buy it. It's really light on the skin and I hope to do a review soon!

Until next time! 

Hi everyone! It's been quite a while since my last post, but I'm back with another make-up post! I'm back in Taipei right now, so I thought it would be prudent to share what cosmetics I usually bring with me when I'm going to be out of the country for a certain period of time. Of course, it's a given that I'll be bringing my everyday make-up bag which I made a post about here. But if I'm going to be away from home for more than a couple of days, I like having the items that are almost always part of my usual make-up routine.


Clinique Moisture Surge CC Cream in Natural Fair

This is my go-to base for everyday. I'm not a fan of foundation much because I find it to be too heavy on the skin. Before I discovered the wonders of CC Cream, I would use BB Cream from Etude house, but even then it would be too heavy on my skin and caused me to break out a couple of times. Admittedly, my skin is quite clear and doesn't need much coverage so I decided to give CC Cream a try. And from then on, it was love! <3 I love this one from Clinique. It provides light to medium coverage and gives my skin that dewy appearance. It's really easy to apply, the formula being neither too thick or too runny and doesn't streak no matter what I use to apply it with.


Guerlain Meteorites Blanc De Perle

My finishing powder of choice! A lot of people consider this a holy grail item, and honestly, I can see why. It leaves a really nice, smooth yet natural finish on the skin with really fine shimmer that makes your skin glow. Some people are bothered by the shimmer, but personally, I love it. I would bring it around with me everyday if I could, but movement tends to make the pearls break up and crumble and the container is a bit bulky, leaving me no choice but apply it at home before I leave and leave it at home. I'm thinking of finding a nice compact where I can place a couple of pearls in to make it a bit more portable.


Smashbox Full Exposure Palette

This one holds a special place in my heart as it is the first eyeshadow palette that I ever picked out for myself! (Most of my cosmetics are gifts, you see.) You can even somewhat see how beaten up this particular palette is. The wide range of neutrals in both shimmer and matte make it perfect for everyday use or even special occasions.  I really love the matte shadows as they are really buttery and apply perfectly. The shimmer shadows aren't really easy to pack on the lid and tend to fall out, but this is easily remedied by using an eyeshadow primer.


Lancôme Colour Focus Eye Colour Quad in 4Romance

This is a very new addition to my collection – a gift I received from my mother recently. I've only used it twice before, and the pigmentation isn't at all that great and it takes quite a while to build up the color but the shadows are really smooth and feel very light on the skin. Despite the troubles I have with applying it, I brought it along anyway because I love how I can make a subtle smokey eye with it.


Maybelline Colorshow Crayon Kohl in Blue

I am a big fan of colored eyeliner and blue just happens to be my favorite! I don't use it everyday, but there are times when I'm too lazy to put on eyeshadow and I just apply a line of blue liner for a pop of color. Minimal effort, but still gives off the impression that I actually tried to make myself look presentable.


Real Techniques Starter Set and Silicone Eyeliner Brush

It comes with a carrying case! Isn't that reason enough to bring it around? Kidding aside, I put the most effort into applying eyeshadow when I'm doing my make-up, so having this set is a must for me.

From L-R
1. Silicone Eyeliner Brush
2. Accent Brush
3.  Fine Liner Brush
4. Base Shadow Brush
5. Deluxe Crease Brush
The set also came with an Eyebrow brush but I have long since given it to my mom because I don't do my eyebrows. 

The Silicone Eyeliner Brush is sold separately. Though the set comes with an eyeliner brush, I prefer the silicone one when applying gel or liquid liner because it allows for more accuracy and cleaner lines. Also, I find the Fine Liner brush to be a bit too tough and scratchy and is prone to irritating my lids. The other brushes are fantastic though. They apply eyeshadow really well and are really soft.


Bare Minerals Full Flawless Face and Flawless Face Brushes

These two brushes are extremely soft, pick up products really well, and buffs them on the skin wonderfully! I use the Full Flawless Face Brush to apply my Guerlain Meteorites. I've read that not all brushes can pick up the powders from the Meteorites well, but I've never had such a problem with this brush! I also use it sometimes to sweep away eyeshadow fall-out. I use the Flawless Face Brush with my Estee Blush (which I wrote about here). It does wonders at buffing the blush onto my skin! I've mentioned before that the Estee Blush took a while for the pigment to build up, but I've had more success with using this brush than any other brush I tried applying it with before.


Too Cool for School Milky Tint in Red

I always bring around the Milky Tint in Pink and use it more often but there are those times when I feel a bit more daring than usual. During these times, I feel like using this lip tint for a more in-your-face color on my lips. Here's a comparison photo:
Pink on the left. Red on the right.

 I rarely use it by itself– I usually use it with the Pink Tint for gradient lips. (Which I haven't learned to apply properly yet. Boo hoo.)

I would have added my Bobbi Brown Long Wear Gel Liner, but it has dried up and become unwieldy so I opted to leave it back home.

And there you have it! A run-down of my travel must-haves! Until next time! :)