There are just some things that one can't outgrow, and for me, Prince of Tennis (TeniPuri) is one of them. I first got into TeniPuri back in 2007,  when I was still in highschool and eight years later I'm, once again, hooked on the series and its franchise (anime, manga, character songs, stage musicals– you name it). It's ridiculous, really, how much I love this series with all the outlandish tennis moves with just as outlandish names. Would you believe they made a stage musical out of it? A hugely successful one at that? I've been practically drowning in TeniPuri for the past month and it was only a matter of time before I did something TeniPuri-related.

So here it is: TeniPuri-inspired nails. To be more specific, Hyotei Gakuen-inspired nails. Prince of Tennis tells of Seigaku's, a middle-school tennis team, bid to win the National Tournament and Hyotei Gakuen is one of the many rival schools they face.


Image from Zero-chan.net

Like many of the other rival schools in the series, Hyotei is full of eccentric characters that are all strangely endearing that it's difficult not to root for them. Eventually, they ended up as my second favorite rival school in the series, the first one being Rikkai Daigaku Fuzoku.

Hyotei's color motif leans more towards  light blues and gray it was easy for me to find lacquers from my collection that would suit their image. 

(L-R) Seche Vite Dry Fast Top Coat, OPI Teal the Cows Come Home, Clinique Made of Steel

In Japanese, Hyotei (氷帝) can be roughly translated into "ruler of ice." (If I'm not mistaken.) Due to this, Hyotei is associated with ice.  This association is most notable when it comes to the captain and one of my favorite characters, Atobe Keigo. This is largely due to one of his techniques in the series called "World of Ice", where he can see an opponent's weak spots which are represented by shards of ice. (Sshhh. This is anime/manga. It's allowed to be outrageous.) In the musicals, Hyotei even has their own version of what I call the "douchebag rival song" aptly entitled "Ice Emperor" in which they pretty much tell the protagonist team, and everyone else to "Kneel down, worship, and honor us." This is why I opted for an icy blue and I thought Teal The Cows Come Home was perfect. I added Made of Steel as an accent nail to nail (pun intended) that Hyotei Gakuen color motif. 


Anyone who knows me knows that I am weak against sparkly things, so instead of just going with the icy blue and dark grey I added on rhinestones and glitter. It may seem a bit over the top, but I was going for Atobe Keigo, arguably the center of Hyotei and known for being over the top. Self-styled and widely recognized as "King," Atobe's flamboyant tendencies have been somewhat of a running joke within the franchise and the fandom, so the rhinestones play into the theme well. Maybe I should change the title of this post to "Shousha wa Atobe!" instead. 


I had a lot of fun with this nail art. Granted, it was a bit difficult getting the rhinestones on my nails, but seeing the end-result is satisfying. Isn't it pretty? Not only is it a combination of two of my interests (anime/manga and cosmetics holla), but it suits the Christmas Season as well! December is drawing near and nothing says Christmas festivities quite like a little sparkle sparkle.

I'm hoping I could do more of these cross-overs in the future. Rikkai nail art would be nice, if only I could pull off yellow nails.

Until next time!

Guess who just stepped into the world of lippies? I used to be not too keen on lip products aside from lip balm or lip tints, but I am a changed woman now. I do use lipstick occasionally, when I know that I won't be eating or drinking any time soon, but it's still one of those things I usually forgo when I put on makeup.

My biggest problem with lipstick is that it tends to transfer and fade easily, even when I'm just taking a drink. It might be just me over-reacting, but whenever I see lipstick left on that straw I just used, or the glass I took a sip from, all I could see was the money that went into that lipstick. Still, I did like lipstick well enough, so I began my search for resilient lip colors. During my last visit to Taipei, I found out about Clio's Lipnicure, which had a lot of raving reviews. Sadly though, the original matte Lipnicure was no longer on sale, and I wasn't too keen on the new Lipnicure Glass and its shades. However, I did find the Lipmanicure by RiRe, an obscure Korean cosmetics brand. It was obviously a dupe of the Lipnicure, but since I fell in love with the Wine Burgundy color, I went for it.

Rire's Lipmanicure in Wine Burgundy and Muse Red

Rire's Lipmanicure comes in 11 shades, but they're not easy to find. In Taipei, they're not available in most drugstores or beauty stores. I was lucky enough to find these two colors at Strawberry Paradise Beauty House in one of the alleys in Ximending. In most other places, like 86shop, the shades available were either too pink, or too orange. These were on sale when I bought them, so I bought two colors: Wine Burgundy and Muse Red. At first glance, they look like cute little bottles of nail polish and come with a short applicator. Upon opening the bottles, you get hit by this artificial-smelling fragrance of sort, but it disappears after a while, so I didn't get too concerned about it.


Personally, the applicator was too short and wide cap made it really difficult to apply the lipmanicure. Especially for someone like me who prefers clean lines when it comes to my lips, the applicator was a nightmare. Midway into applying this for the first time, I gave up and switched to a lip brush.

Muse Red (L) and Wine Burgundy (R) applied with the built-in applicator.

Muse Red is a warm, matte, bright red shade, while Wine Burgundy is a rather cool, matte, dark red. All of the Lipmanicure colors come in matte, but you can also opt to purchase the top coat if you want a glossy finish. (Just like a real manicure!)

When it comes to application, awkward applicator aside, the product applies smoothly. However, it is important to note that the product dries quickly. This is because once the lip manicure dries, it will not budge. If you try to even out layers by building it up, you're going to end up with patchy looking lips. What I do is, working one lip at a time, I outline my lips with it, then fill it into get a nice, even layer. The great thing about these shades though, is that one layer is enough for a solid finish. Honestly, two layers might be a bit too much.

Aside from Wine Burgundy and Muse Red being just the colors I wanted for my lips, I loved how resilient it is.This is what the Lipmanicure looked like after I put it under running water and tried to smudge it with a finger.


It smears a bit, but otherwise, it looks untouched. If I hadn't touched it right after wetting it, I doubt it would have smeared. I've worn Wine Burgundy a couple of times, and it really doesn't transfer onto anything. Not on my glass, not on a straw, not on a bottle of water...that's how resilient it is! Though wiping my mouth with a tissue did cause some of it to come off, it was barely noticeable. It did start fading and smudging when I had oily food, but that's understandable. 

Removing it is a bit of a challenge. Although my Shu Uemura Cleaning Oil had very little problems getting it off my lips, it did require a bit of elbow grease to get the stains off the area around my lips where it had smeared while I was trying to remove it. 

The RiRe Lipmanicure dried my lips out so much, that it cancels out its other positive qualities. It's such a shame because I really love the Wine Burgundy shade and it's staying power. If anything, I'll just end up putting this on whenever I feel like taking a nice selfie and then removing it immediately after.

Here is a little selca of me when I first tried out the Wine Burgundy color:
Isn't the color so lovely? I feel like an evil queen. Or a teleserye contrabida mom.


Why yes, I do have a tiny tiara just lying around.


Huzzah! This blog is alive!

Considering my updates have been few and far in-between, and by that I mean I've only updated TWICE within the past year, this blog is going through a reboot of sorts. I've been considering going through a revamp for a while now, but I've been otherwise occupied with work, animes about tennis, musicals about tennis, and well, the prince of tennis. Encouraging words from my lovely Elaine-jiejie gave me that final push to restart this blog. That and now that I've found the charger for my camera, THERE IS NOTHING IN MY WAY! (Excuses, excuses.)

So, here it is. Welcome to The Princess Build 2.0! Isn't the new layout nice? The old one took ages to load, and not minimalist enough for my liking. It still needs a bit more pink though. Though my posts will still be mostly about cosmetics (I mean, where else is it socially acceptable to ramble on and on about make up?), I do intend to branch out and post about my other interests and more of my photography. Who knows, maybe I'll even post about stage musicals with people dancing around with tennis rackets.

Until next time!
Hello everyone! It's been a while (a really long while) since my last post, but I'm back with a short nail art set review!

Aside from it being a long time since I last did a review, it has also been ages since I last put on nail polish, let alone nail art. So when my older brother brought me this as pasalubong  from his trip to Malaysia, I got really excited and couldn't wait to try it out.


This is the Bling It On Neon Set from Nails Inc. London. I have honestly never heard of this brand before, so I have no expectations for it other than yes, sparkly. I like. 


The set comes with two bottles of glitter, a small bottle of base lacquer, a small bottle of top coat, a tray to catch glitter with, and a brush to sweep away excess glitter. I first attempted following the instructions on the back of the box, but it didn't really work out for me. The instructions said to pour an amount of glitter onto the tray, and then to press a nail with wet lacquer on it so that the glitter will adhere to the nail. I tried this method but I've found that the angle was simply too awkward and the method too tedious. The base lacquer was also disappointing. Application was terrible and streaky at best, and the glitter did not adhere to it at all! However, I was determined to use the glitters so I ended up using a different base and a different topcoat altogether.

Seche Vite Top Coat, OPI Teal the Cows Come Home, Nails Inc. Bling It On

For the base lacquer, I used Teal the Cows Come Home from OPI. The color is really close to the color of the glitter so it provides a more solid appearance to the glitter as compared to using a white base. I also chose to pour the glitter over the wet base and let the tray catch the excess– much more efficient. The tiny tray that came with the set was really useful though! It has a tiny notch on the side that made it easy to pour back the excess glitter into the bottle. The brush was also really handy for sweeping away excess glitter so that the nail art won't look too chunky.


No topcoat.

With a proper base coat, the glitter looks FANTASTIC. It really does live up to it's name as "bling"! It's bright, it's vibrant, and it's eye-catching. Without topcoat, it's already really sparkly and has a sandy texture to it, which I personally love. I had to sacrifice the texture though, and added two layers of top coat to make the nail art last longer. Without top coat, I doubt this nail art would last more than a day. 

With Seche Vite Top Coat


I've mentioned before that I really love sparkly, and brightly colored things, but I've usually opted out of using glitter lacquer as it takes forever to wait for each individual layer to dry properly. (I may or may not have patience issues.) However, with this nail set, it's just a matter of applying glitter on top of a wet base, and then pouring glitter on it separately. It may seem like it's more work, but it has a more solid finish from the get-go compared to glitter lacquer, which needs some building up before you get a solid, glitter, finish. 

Aside from the base lacquer (and the top coat that I didn't even bother opening), this is a pretty good nail art set. Simple, straight-forward, yet still so, so pretty! I'm looking forward to try the Bling It On Feathers I also got from my kuya!


Until next time!
Happy New Year, everyone!

The last few weeks of 2014 have been crazy, and I couldn't help but get swept up in the excitement for the festivities. It's been quite a while since I spent Christmas in the Philippines, you see. Even more than that, I got too excited about going to Seoul once again!


Needless to say, a huge chunk of that excitement was because I really, really wanted to experience snow! The first few days in Seoul had me stopping at whatever soft enough pile of snow I could find– not minding the fact that I most probably looked like an overgrown child. On our fourth day, I woke up early enough to catch a snow flurry. It was surreal: seeing tiny bits of ice fall and gently blanketing everything in soft, fluffy, powdery snow. It felt like magic. Despite it being quite an ungodly hour (four in the morning!), I felt that enduring the biting, frigid weather was all worth it.


Of course, I didn't go to Seoul just to see snow (or did I?). It is a must, must, must to go sight-seeing! Seoul has many sights to offer and it really is impressive how much of their history and culture they managed to preserve. In fact, my favorite thing about Seoul is how in the midst of all the modern high-rise buildings, palaces, gardens, and shrines are nestled peacefully.


During our family vacation in Seoul last June, we visited a couple of palaces, but there was so much more that we haven't been to. This time, we managed to visit all five of the Grand Palaces but my favorite has to be the Changdeok Palace.


Despite the freezing, below zero weather we had to brave through during our visit, there was something truly magical about strolling through the courtyards and feeling the ice crunch underneath my shoes. That and the cool crisp air with the too-gentle winter sun made the visit relaxing, yet invigorating. Truly conducive for an artistic soul! I can only imagine what it would be like to spend a day there and just write, write, write.


Located East of the Gyeongbokgung Palace, the Changdeokgung Palace houses what many have dubbed as the "Secret Garden." Also known as the "Rear Garden", sits behind the main buildings of the Changdeokgung Palace and takes up two-thirds of the palace grounds! There's an extra fee to get in, but thanks to the voucher that came along with the Combo tickets we got for all the five palaces, we got in no problem! Everyone has to join a fixed tour, which I personally found enjoyable. The guides gave explanations as to what the smaller buildings inside the garden were for, and why the layout and architecture were the way the were.


There were five different "sites" within the garden itself, and getting from one site to another was a bit of a walk. There was plenty of going uphill and downhill because the garden itself was designed to be one with the natural configuration of the environment. They did give us time to just appreciate the surroundings and take photos.


And appreciate my surroundings I did. Even in the middle of winter when nearly all the trees have shed their leaves and plants are pretty much dead, the Secret Garden was nothing short of breath-taking. If I had the chance, I would like to go back during the spring just to see it with all its greenery!


We also went to visit N Tower. I'm quite happy that this time, we took the cable car up. It was a bit unnerving for me considering I have somewhat of a fear of heights but it was still way better than my last visit wherein my dad insisted that we take the stairs all the way up. 

Locks of love! To anyone who has watched a Korean Drama before, going to Namsan Tower and seeing all the locks of love is a non-negotiable part of the itinerary. I am no different. 


I left a lock of my own back in June, and I'm happy that I managed to find it again! (YOU SEE THAT, SEOUL? I TOLD YOU I'LL BE BACK!)  The lock itself has gotten a bit rusty, but it's still there, holding on. I can only hope that these won't collapse like the bridge in Paris.


I travelled with my younger cousins, so it's pretty much a no-brainer to go to Lotte World! That and the temperature was around -11 degrees centigrade. What better way to spend a freezing cold day than in an indoor amusement park? 


The indoor part of Lotte World would suit younger kids better, but it was still really enjoyable! All the rides, characters, colors, and energy really brings out the kid in me! It wasn't really as crowded as I thought it would be, but the lines were still pretty darn long. It's a good thing they had a Magic Pass system (similar to Tokyo DisneySea's Fast Pass) or else my younger brother and I wouldn't have been able to ride anything without queuing up for an hour. 


What would an amusement park be without the amusement park food? In Lotte World, I had my first ever funnel cake! Dios mio. Why have I never tried it before? It was really delicious, especially with the chocolate glaze. And it was really fun to watch it being made!


Shopping in Seoul in really fun, too! It's quite fun walking around and trying to pick out souvenirs and pasalubong. It's even more fun when shopkeepers give you discounts. :D 


We went to Namdaemun although I feel like I did more eating there than actual shopping. Street food is really hard to resist! Then again, what better way to immerse yourself in a culture than to partake in their food? Hotteok has to be my favorite Korean street food. It's like a pancake with a sweet, sticky filling. During winter, it's best to eat it when it's still hot off the griddle.


I did most (if not all) of my pasalubong shopping in Insadong. Though the weather was really chilly, there was still quite a number of people and tourists milling about! There were so many shops and stalls that it's hard to keep your head from turning! Though some of the stores had similar wares, it was still worth it to try and go into each and every one of them for the best bargain! We also went back to Insadong on our last day in Seoul for some last-minute shopping because it was a walking distance from the hostel we stayed at! So convenient!


It was really fun to end 2014 and begin 2015 in Seoul. My only regret is that I didn't get to try that famous Honey Butter Chips thing because it was always sold out. Then again, it does give me a reason to go back to Seoul!

Looking forward to 2015! Happy New Year, everyone!


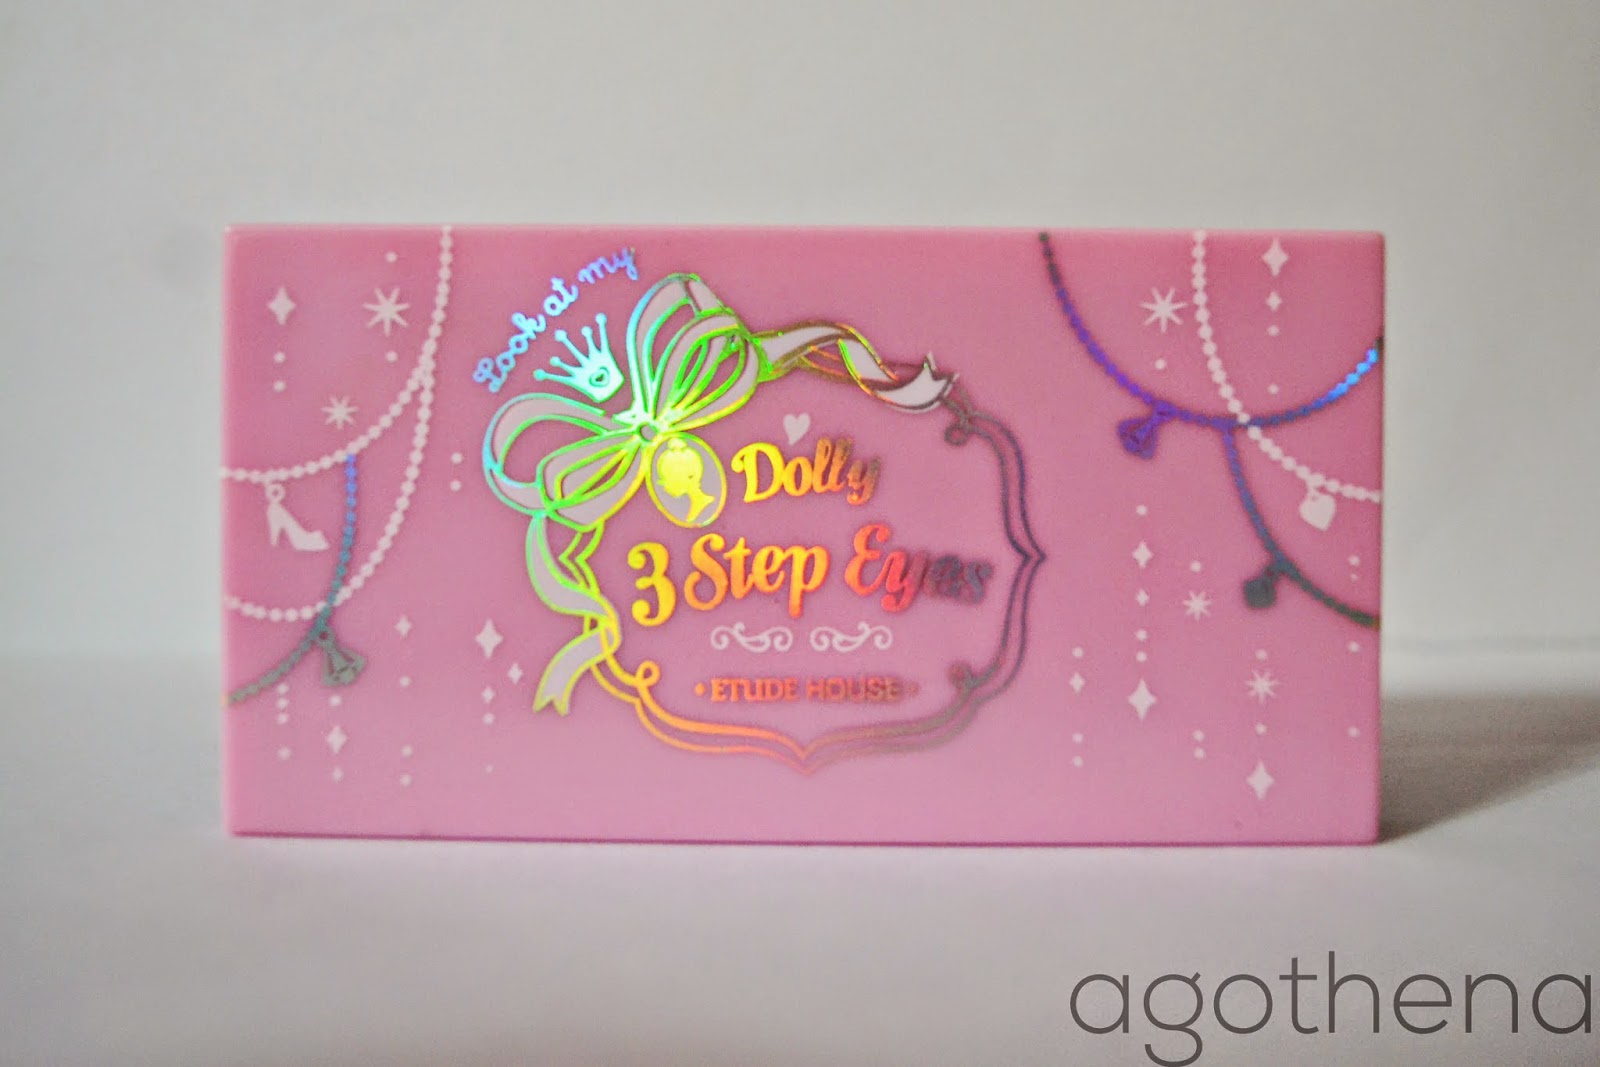
Here is another review for another one of the items I picked up in my Taipei haul: Dolly 3-Step Eyes by Etude House. I walked into Etude House that day planning to buy eyeliner and lip tint, but when I saw this palette, I knew I wouldn't be able to leave the store without it.


Most of my eyeshadows are of nude shades, and I've been wanting to bring more variety into my collection. When I saw this palette, I knew it would be perfect. I personally love bright and bold colors, so it's no wonder that this managed to catch my eye! From L-R: a subtle peach shadow with a satin finish, a shimmery hot pink, and a deep burgundy with a matte finish.


The color-payout is amazing! How you see it in the palette is how it shows up on your skin! I've had my fair share of eyeshadows that look pretty in the palette but does not look good when applied. I was pretty skeptic about the pink shade, at first. I honestly didn't think it would even show properly once applied but whoa. Was I proven wrong. Even without a base shadow or primer, the pigmentation is still solid. Unlike with most other coloured eyeshadows I've tried, there wasn't much need to build it up.

 That being said, the fallout is pretty bad, especially from the middle shadow. I've taken to applying eyeshadow before I apply my base whenever I use this particular palette. Still, the shadow is pretty resilient and when paired with primer, lasts through the day with minimal fading! 

I am very happy with this palette and I'd recommend it to anyone who wants to try something bright and bold for a change!